So, I (Burgess) have kind-of had a lot going on...I'm 5 weeks out from Baby #2, and just moved 4.5 hours south of Lafayette to Evansville, IN. We've been in our new house almost three weeks, and I have desperately been in need of some kind of creative outlet! And what better time to dive into some new projects than for Valentine's Day?!? I've had some ideas for Valentine's gifts for Big W for a while now, and I am thrilled to be unpacked just enough to find my supplies, and I'm just acquainted enough with my new town to find the Joann's store and the Hobby Lobby. So, I'll be blogging about these projects over the next few days.
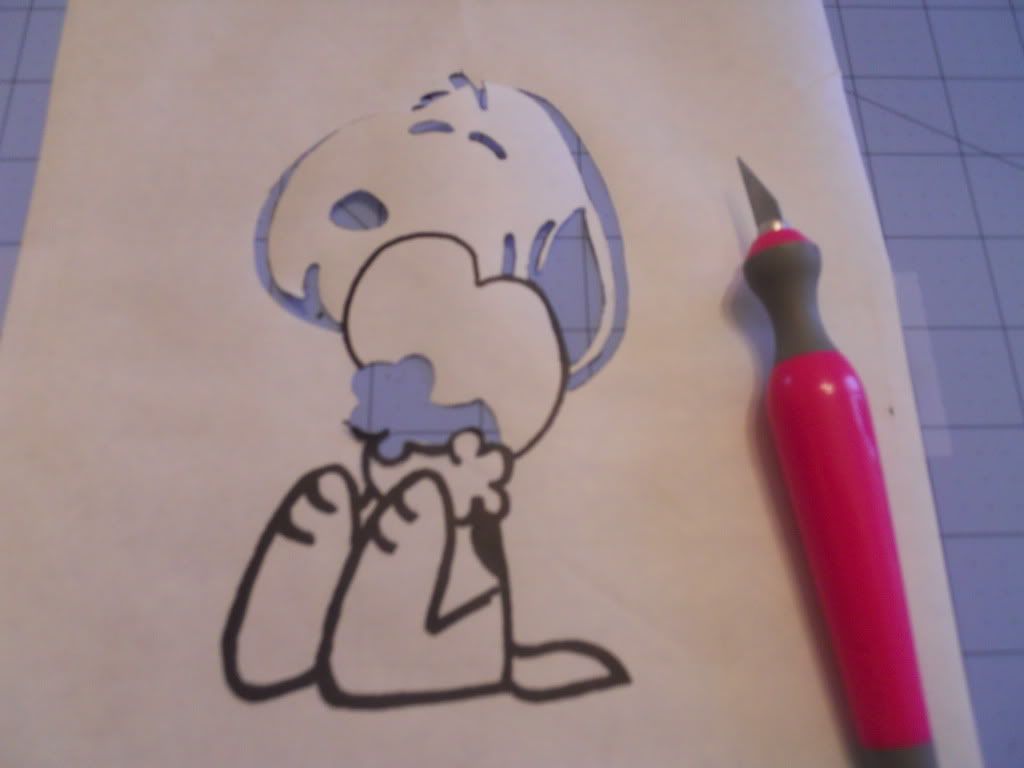
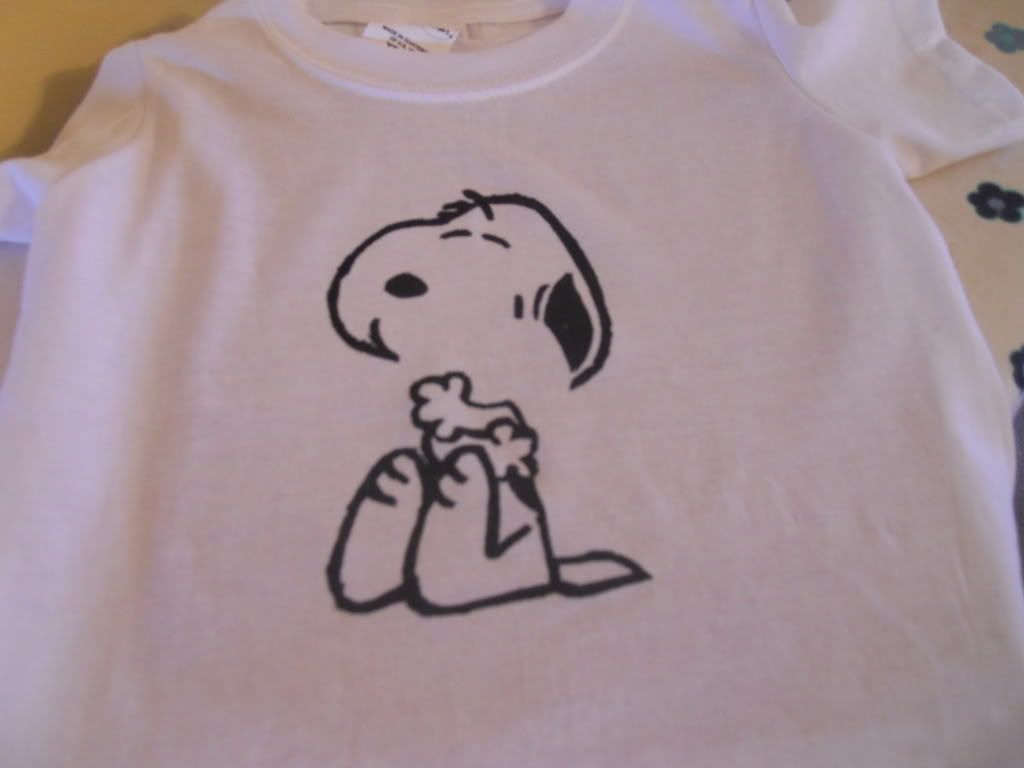
First up, I've been wanting to do some freezer paper stenciling for a while now. I've been following Dana's blog over at MADE for some time, and I LOVE her projects. But I am only just now getting a chance to actually try some of them. She has a great tutorial for freezer paper stenciling here. I pretty much just followed this tutorial, but I will show you my steps too. Big W loves Charlie Brown holiday TV specials, so when I was trying to think of something to stencil for Valentine's Day, I kept coming back to Snoopy. I found a great basic image just by Googling "Snoopy, Valentine." So, first I just copied the image to my clipboard on the computer and resized it to a size appropriate for the t-shirt using Adobe Photoshop. I printed this image (the one on the left), and then traced it onto another piece of paper using a Sharpie (the one on the right), just to have clear, dark lines to follow.
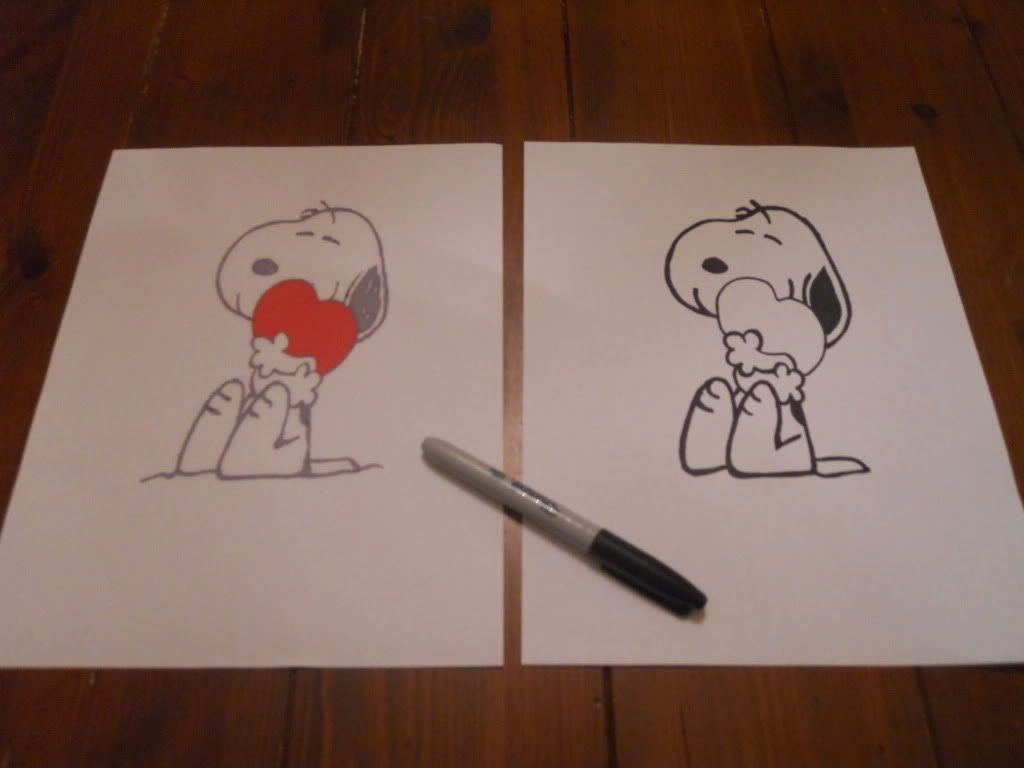
One difference between my image and those that Dana used on MADE is that I attempted one that would require TWO paint colors (black and red). It just adds an extra step to the process, which you'll see later.
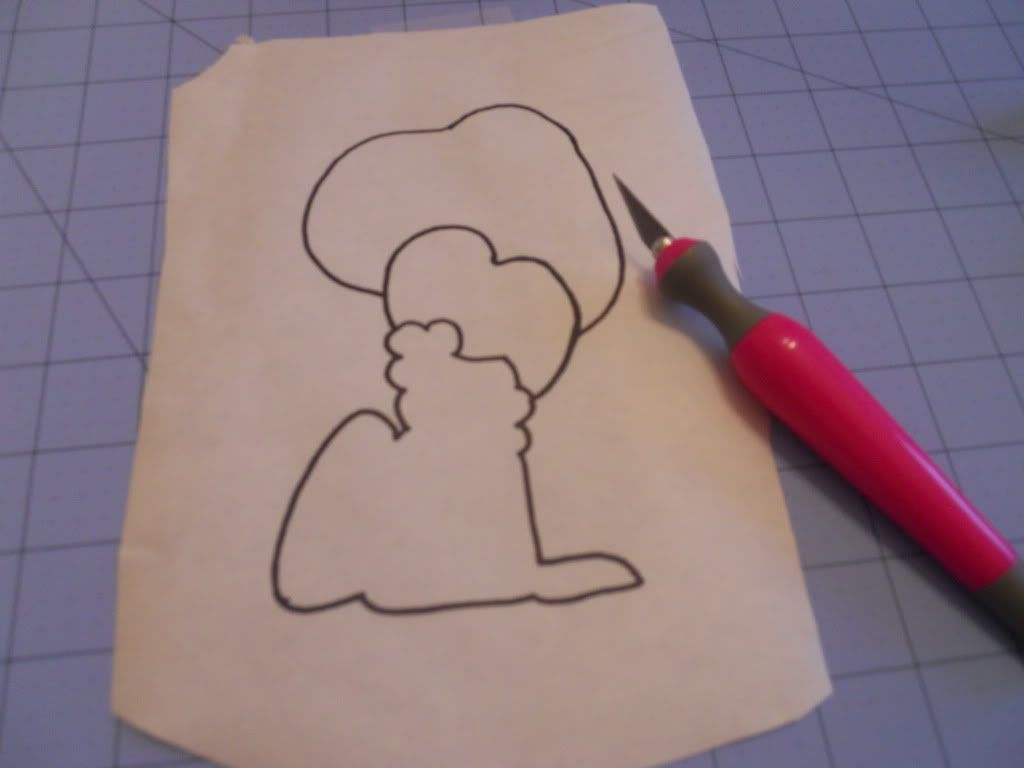
Next, using basic freezer paper that I bought at the grocery store, I placed the freezer paper slick side down onto the Sharpie image and traced again using the Sharpie, on the "dull" side of the freezer paper. I really "thickened up" the black lines because those are the ones I later cut out so that they would be painted black on a white t-shirt.
Next, is the tedious step of cutting out the parts that you want painted on the shirt. This was tedious for me because of the image I chose. Below, you can see that I used an Exacto knife to cut out the parts that I wanted to paint black. I forgot to take a picture of this, but in some cases you'll completely cut out pieces that you actually want to remain the color of the shirt. For instance, below, you can see that I cut out that entire top arm of Snoopy's. But I kept that piece so that I could put it back in the image when I ironed it to the shirt. (You'll see what I mean when I paint the image on the t-shirt.)
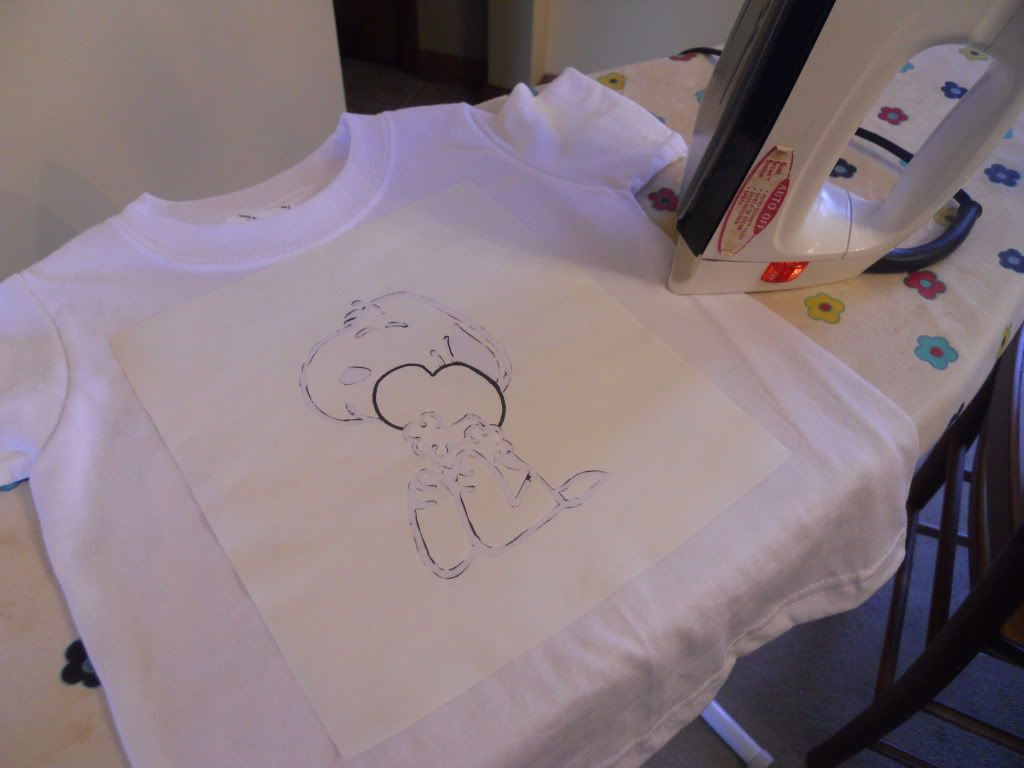
Once you're done with all the cutting, it's time to iron the image onto your clothing. Place the image shiny side down onto your clothing and just iron it on (I used a pretty hot setting)! Take care to make sure the image sticks well in all the little nooks and corners so that no paint seeps onto other parts when you're painting.
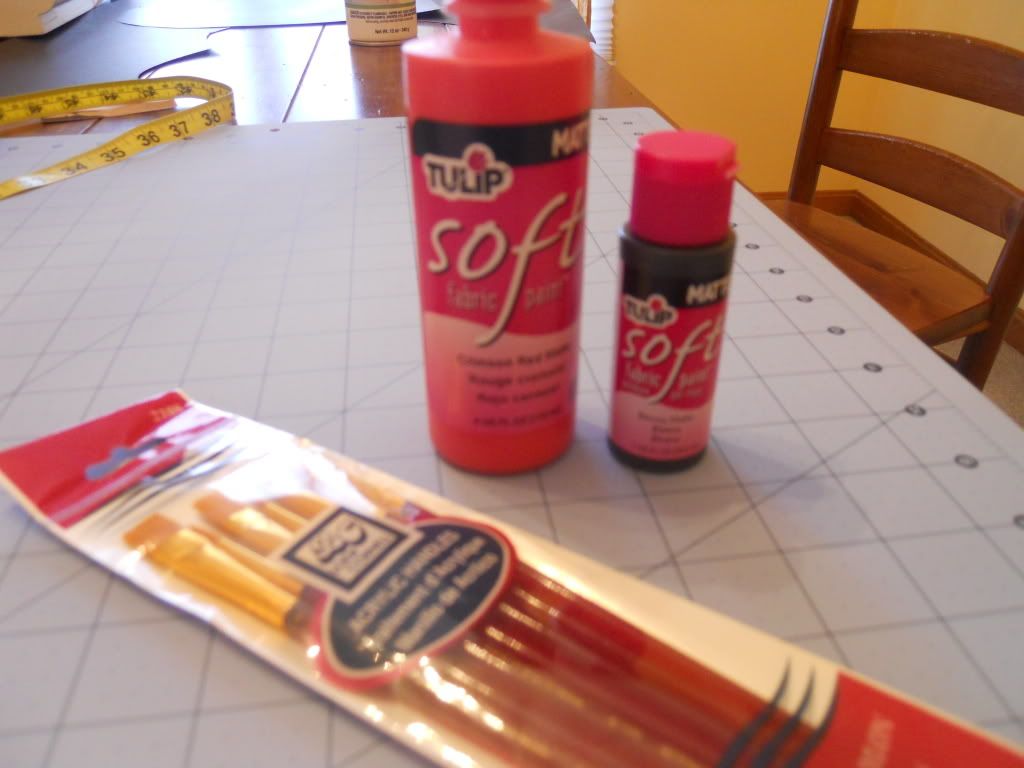
Now you're ready to paint! As Dana recommends, I found Tulip brand fabric paint in a matte finish. And I used a wide paint brush.
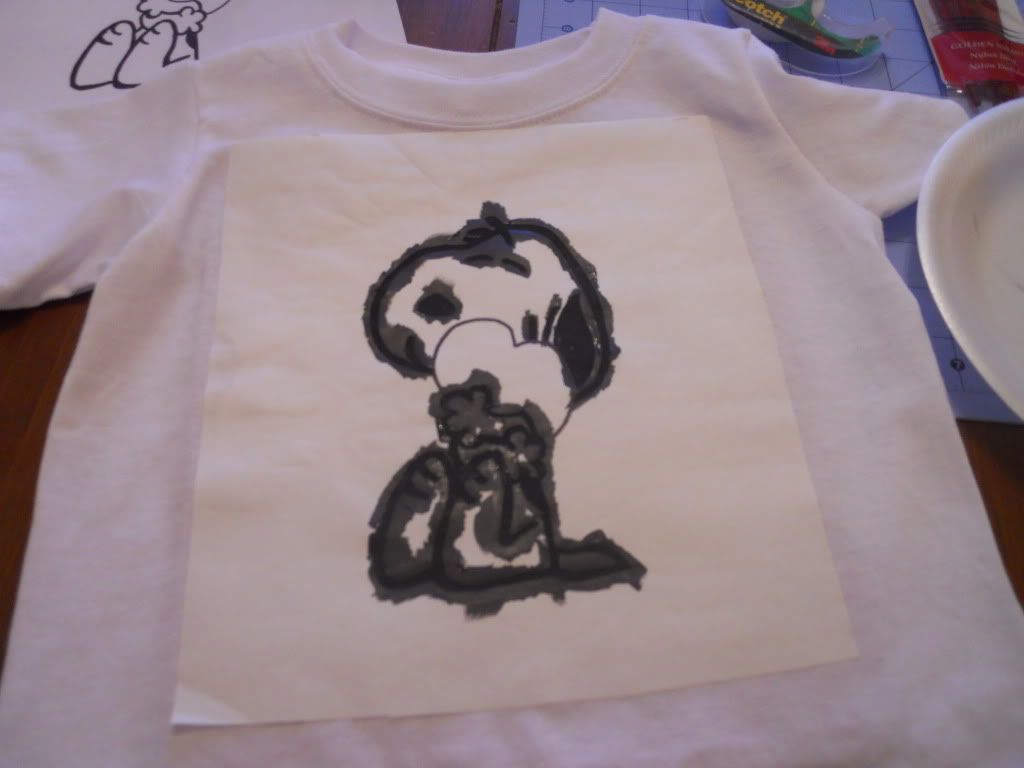
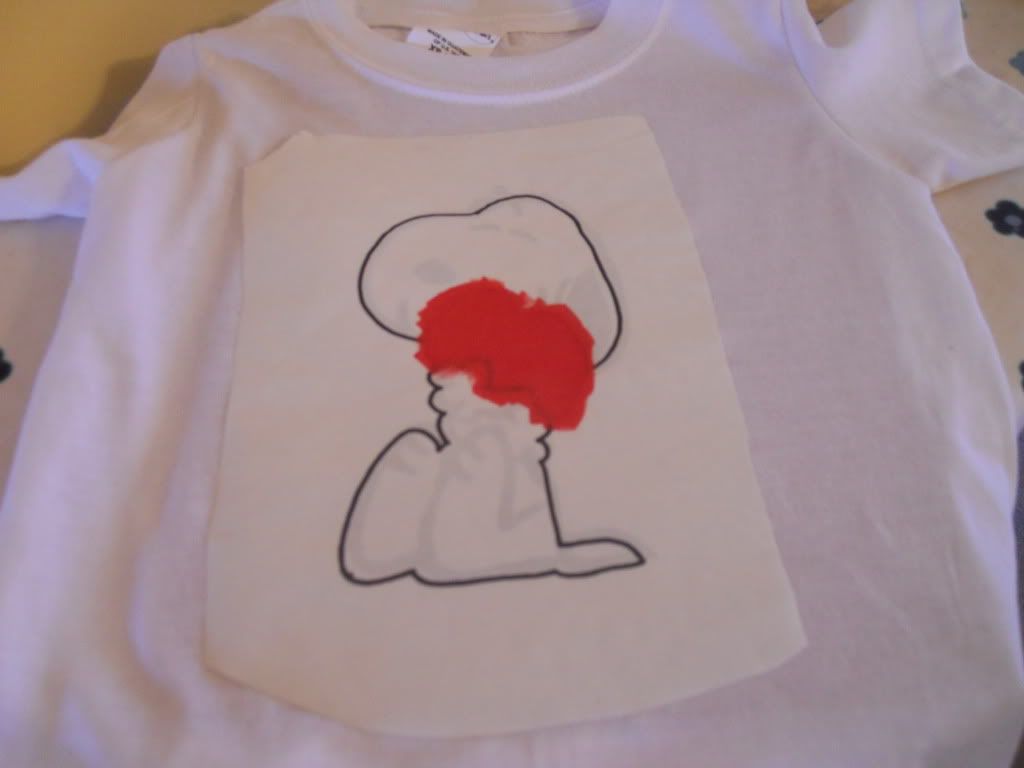
I started with the black paint and painted over all of the cut-out areas.
You can then let it set for a few hours to dry, or, if you're antsy to see the end result like I was, you can use a hair dryer to speed up the drying process. Then you simply peel the paper off of the t-shirt. Voila!
Here's my extra step…since I wanted the heart Snoopy's holding to be red, I did another freezer paper stencil of the image, just cutting out the heart. I just outlined the rest of Snoopy so that I could have a reference when lining up the image over the one already painted on the t-shirt.
Again, just iron the freezer paper to the t-shirt, shiny side down. Then I painted the heart red.
Repeat the ansty-ness and dry with a hair dryer, if you want. Then peel the paper off.
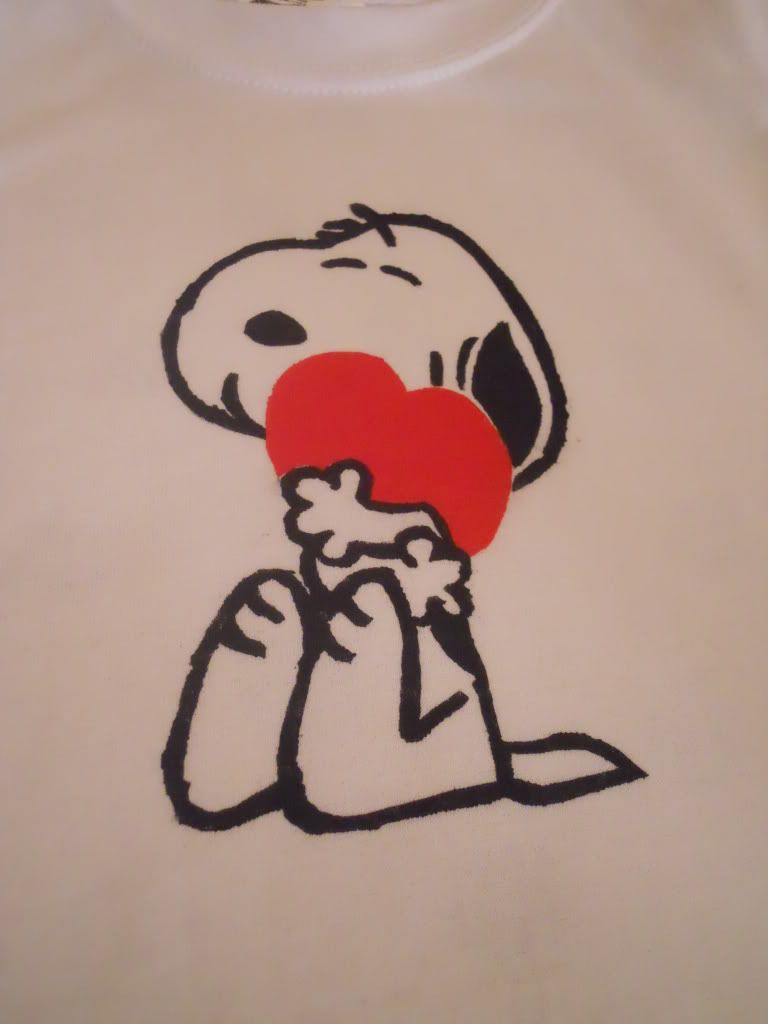
How stinking cute is that?!? I now let the t-shirt dry for a good 4 or 5 hours, and then, per Dana's suggestion (because the paint bottle didn't say anything about this), I ironed the image to seal in the paint.
Here's the final close-up…
I plan on giving this to Big W in his Valentine's treat bag on Monday so that he can wear it to his preschool Valentine exchange on Tuesday. I'll try to remember to take a picture and post it next week. I'm so excited to see him in it, and this was such a fun project I may never buy another Batman, Superman or Disney t-shirt again when I can just do this myself!
readmore»»