Monday, March 14, 2011

once a princess...always a princess

.
0 comments


In January of 2003, I was given one of the biggest honors of my life...I was selected to be an Indianapolis 500 Festival Princess! Being a born and bred Hoosier, the Indianapolis 500 race is such an Indy tradition. I was so thrilled to be a part of that experience, to represent the 500 Festival and all of its activities, and to wear the Princess tiara and sash with pride! Through this program, I met my my best friend Ambra, and many other fantastic girls!

Eight years later, I am still heavily involved with the 500 Festival's Princess Program. I serve on the Princess committee and participate in many (many) of their activities. Honestly, I never would have guessed this opportunity would have given me the priviledge of being a part of one of the greatest sisterhoods ever! Once a Princess, always a Princess..and every year, I meet more and more past-Princesses (not former--because you never lose the crown!). In fact, Cat Sadler from E! News is a former Princess.

So a few weeks ago, the newest class of Princesses met for their orientation. Not going to lie...the 2011 Princesses are fantastic! They are so sweet and gorgeous and fabulous! It's going to be such a fun year!

The 33 Princesses (one for each driver) with the Princess Coordinator Co (or Queen Mother CoCo as I affectionately call her!)

Every year, past Princesses are paired with a current Princess to serve as their mentor and help them through the many months of outreaches and tiara-wearing events. This year I have the BEST Princess!! Her name is Ali and she goes to Purdue (my alma mater!)! The best part, I used to work with Ali's mom and specifically requested to be paired with this amazing girl.
(this is right after Ali received her sash and tiara)
I seriously cannot wait for the month of May!!

readmore»»

ruffled cardigan refashioned

.
0 comments

Hello faithful readers!

Many many apologies for the tardiness in blog posts lately. There have been some exciting developments in the lives of the Hicks Girls lately...but more on that in a future post.

Mainly, I wanted to show you some of the projects I've been working on lately. First up...one of my new favorite things in my wardrobe! This refashioned ruffled cardigan!!

Sister just moved from Lafayette to Evansville, and in the process she made some major donatiosn to Goodwill. Being the sweet and wonderful sister that she is, she allowed me first stabs at most of it and I grabbed some "treasures". The American Eagle cardigan and silk-flowered cami below were two such treasures!

Now, I'm not a simple cardigan girl....so I decided to jazz this one up a bit!

I cut up the camisole and ruffled it some of the pieces. I also took the zipper from the side and the lace from the top/bottom to make some flowers. Then I cut up an old white t-shirt to use as the base ruffle....and TA DA!!!

The final product....and I'm totally in love with this!!


(excuse the lighting of this "artsy" selfie)
Seriously, is this ruffled cardigan not one of the cutest things you've seen!?!?!?!


Here's where I'll be linking up this week!


Sumo Sweet Stuff


readmore»»

Thursday, February 24, 2011

I :heart: freezer paper!!

.
9 comments

Well Sister posted a blog last week about making Big Dub a Valentine's Day shirt using freezer paper...and her genuis is contagious. I went down to Evansville last weekend to hang out and we got crafty! (Honestly, we are crafty and creative on our own...but it's been a long time since Sister and I crafted together.)

Needless to say, we busted out the freezer paper for another round of fun-ness!! I have quite a few babies being born in my life in the next couple of months...so I hit up JoAnn's for some of these cute bibs and got to work!

Clearly, these are for a special little boy who will be here sometime in May.
I'm freaking in love with the mustache one...how funny is that??!?!?!

I couldn't leave BGB out of the mix! She'll be here in about a month and she has to be the best dressed babe in Evansville! :)

I do really love the Rock N Roll one too!

And now I'm on a freezer paper high. What else can I stencil and paint???


readmore»»

Saturday, February 12, 2011

Valentine's Project: Freezer Paper Stenciling

.
1 comments

 
So, I (Burgess) have kind-of had a lot going on...I'm 5 weeks out from Baby #2, and just moved 4.5 hours south of Lafayette to Evansville, IN. We've been in our new house almost three weeks, and I have desperately been in need of some kind of creative outlet! And what better time to dive into some new projects than for Valentine's Day?!? I've had some ideas for Valentine's gifts for Big W for a while now, and I am thrilled to be unpacked just enough to find my supplies, and I'm just acquainted enough with my new town to find the Joann's store and the Hobby Lobby. So, I'll be blogging about these projects over the next few days.


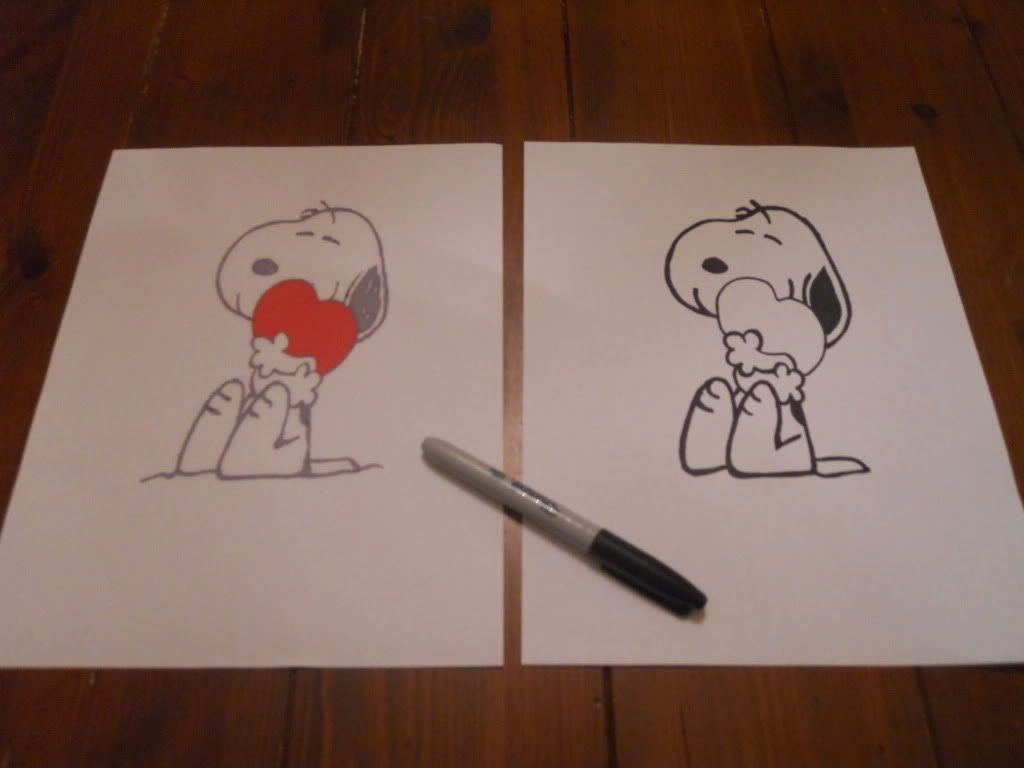
First up, I've been wanting to do some freezer paper stenciling for a while now. I've been following Dana's blog over at MADE for some time, and I LOVE her projects. But I am only just now getting a chance to actually try some of them. She has a great tutorial for freezer paper stenciling here. I pretty much just followed this tutorial, but I will show you my steps too. Big W loves Charlie Brown holiday TV specials, so when I was trying to think of something to stencil for Valentine's Day, I kept coming back to Snoopy. I found a great basic image just by Googling "Snoopy, Valentine." So, first I just copied the image to my clipboard on the computer and resized it to a size appropriate for the t-shirt using Adobe Photoshop. I printed this image (the one on the left), and then traced it onto another piece of paper using a Sharpie (the one on the right), just to have clear, dark lines to follow.


One difference between my image and those that Dana used on MADE is that I attempted one that would require TWO paint colors (black and red). It just adds an extra step to the process, which you'll see later.


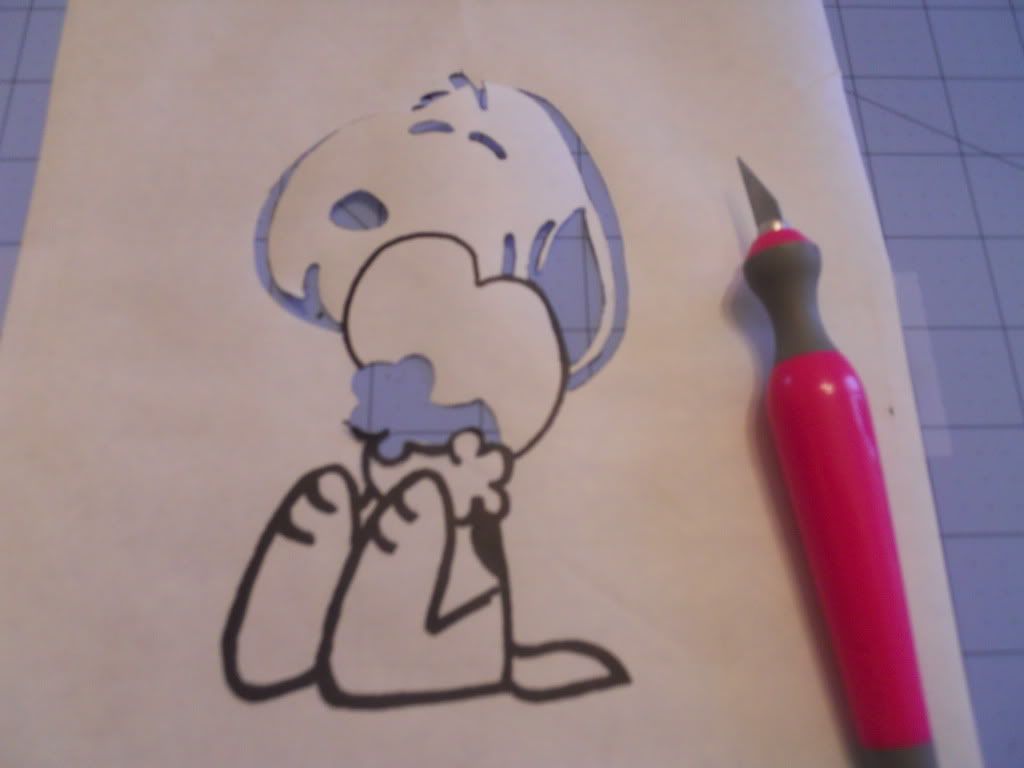
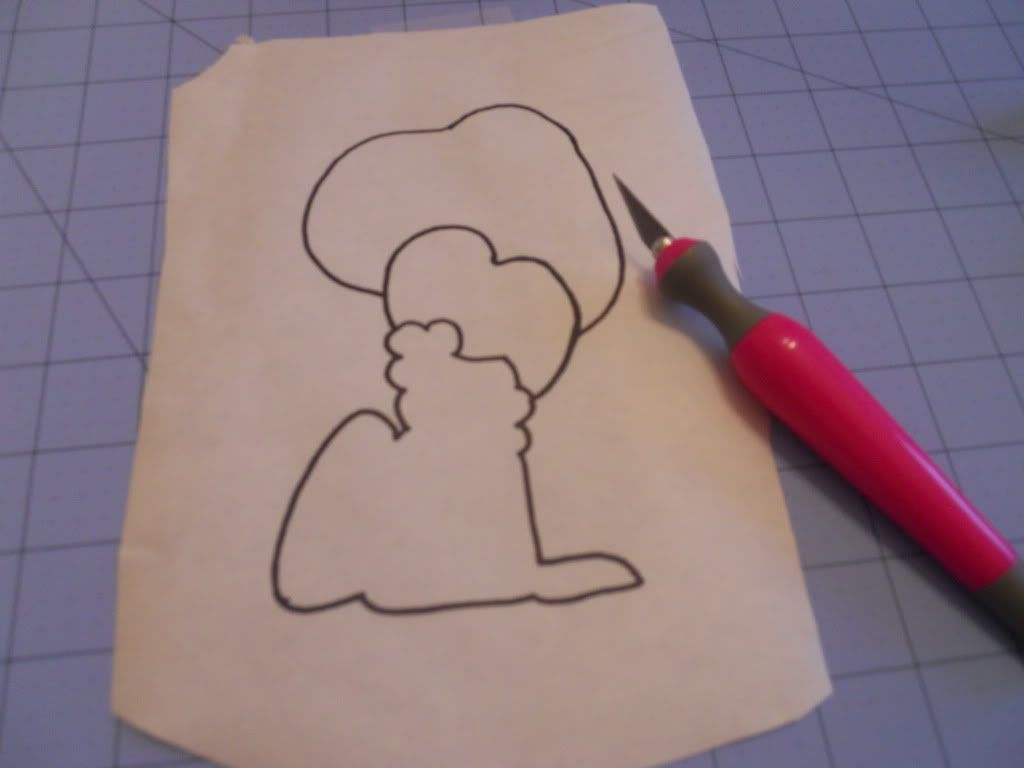
Next, using basic freezer paper that I bought at the grocery store, I placed the freezer paper slick side down onto the Sharpie image and traced again using the Sharpie, on the "dull" side of the freezer paper. I really "thickened up" the black lines because those are the ones I later cut out so that they would be painted black on a white t-shirt.


Next, is the tedious step of cutting out the parts that you want painted on the shirt. This was tedious for me because of the image I chose. Below, you can see that I used an Exacto knife to cut out the parts that I wanted to paint black. I forgot to take a picture of this, but in some cases you'll completely cut out pieces that you actually want to remain the color of the shirt. For instance, below, you can see that I cut out that entire top arm of Snoopy's. But I kept that piece so that I could put it back in the image when I ironed it to the shirt. (You'll see what I mean when I paint the image on the t-shirt.)


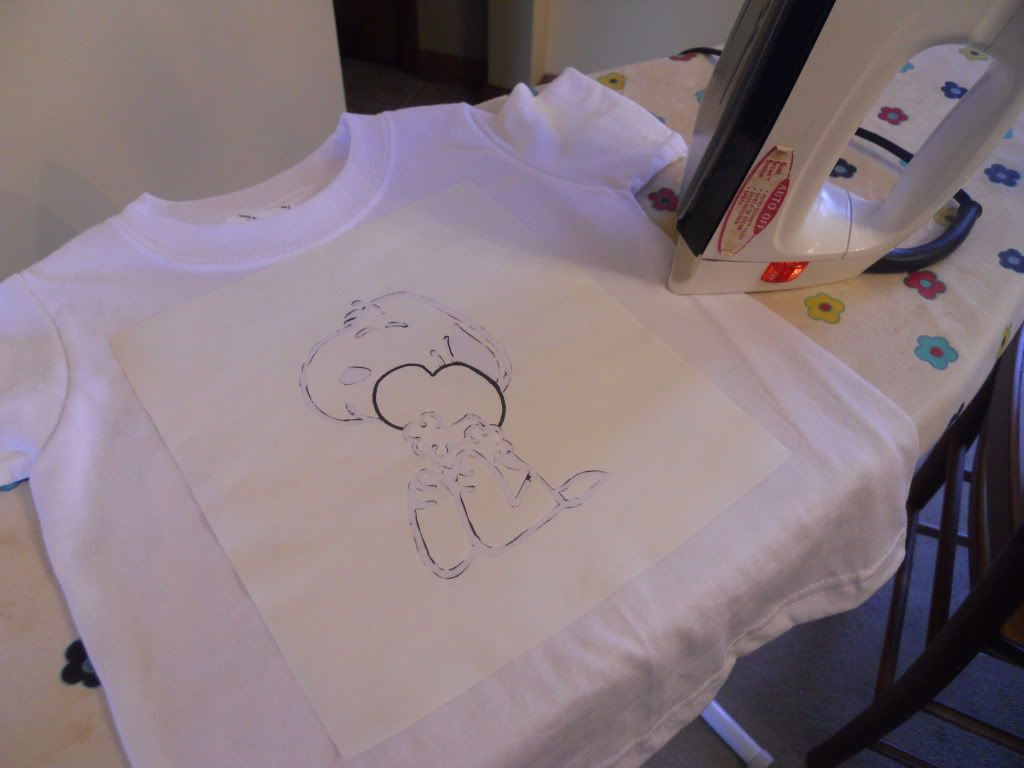
Once you're done with all the cutting, it's time to iron the image onto your clothing. Place the image shiny side down onto your clothing and just iron it on (I used a pretty hot setting)! Take care to make sure the image sticks well in all the little nooks and corners so that no paint seeps onto other parts when you're painting.


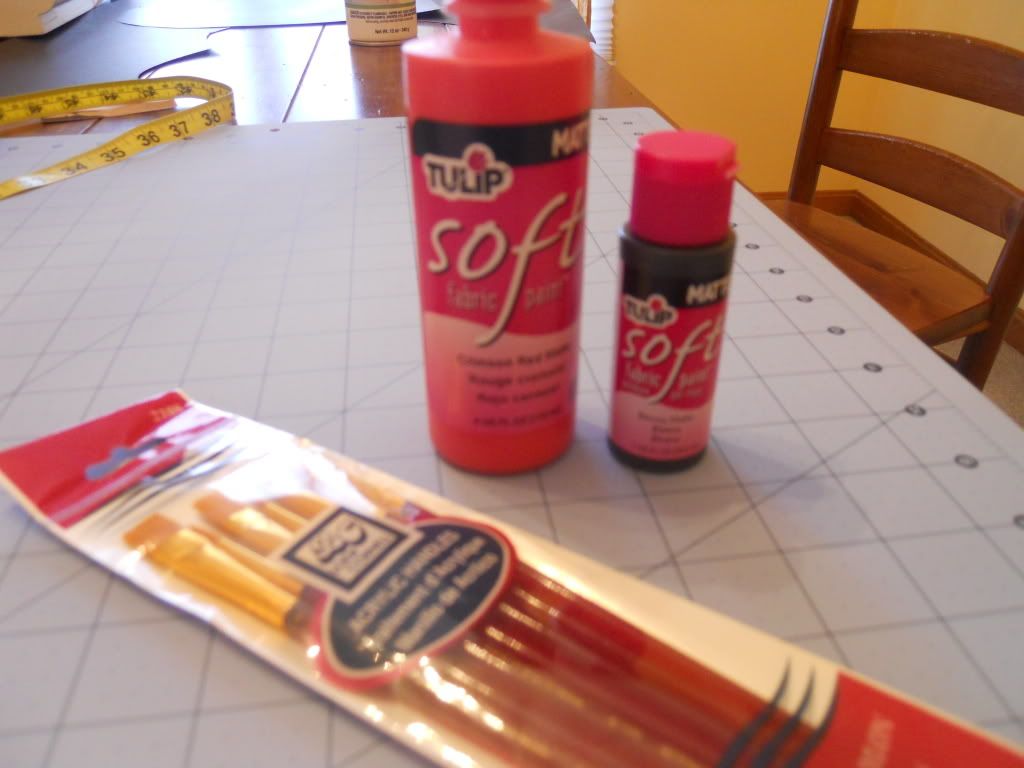
Now you're ready to paint! As Dana recommends, I found Tulip brand fabric paint in a matte finish. And I used a wide paint brush.


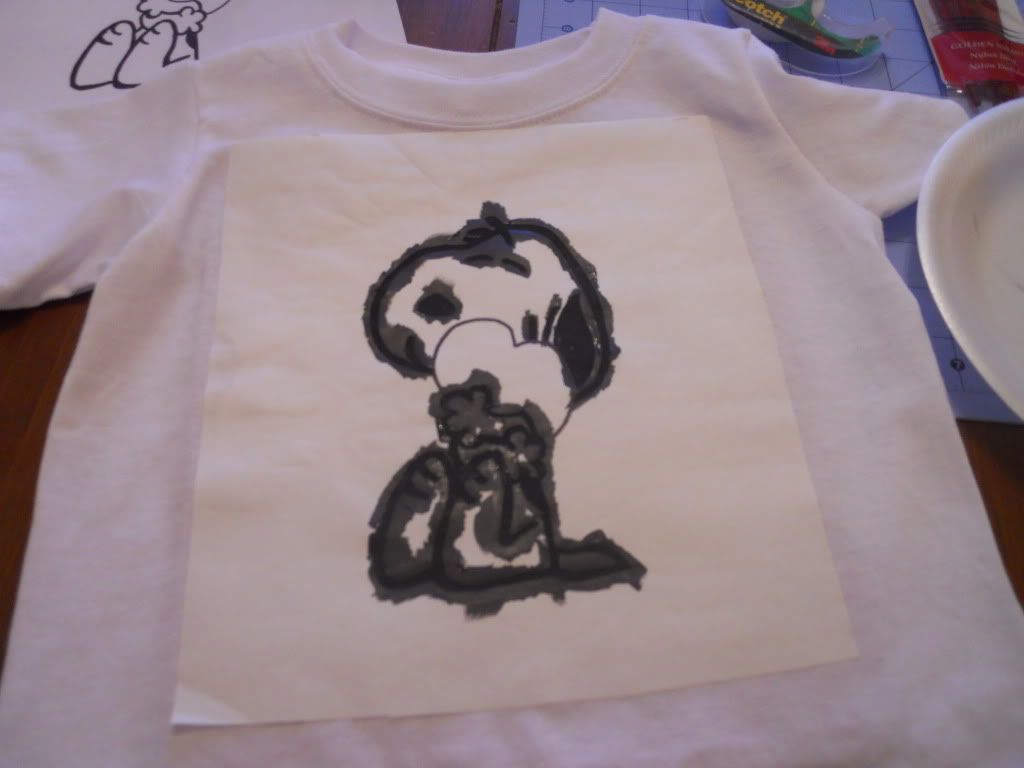
I started with the black paint and painted over all of the cut-out areas.


You can then let it set for a few hours to dry, or, if you're antsy to see the end result like I was, you can use a hair dryer to speed up the drying process. Then you simply peel the paper off of the t-shirt. Voila!


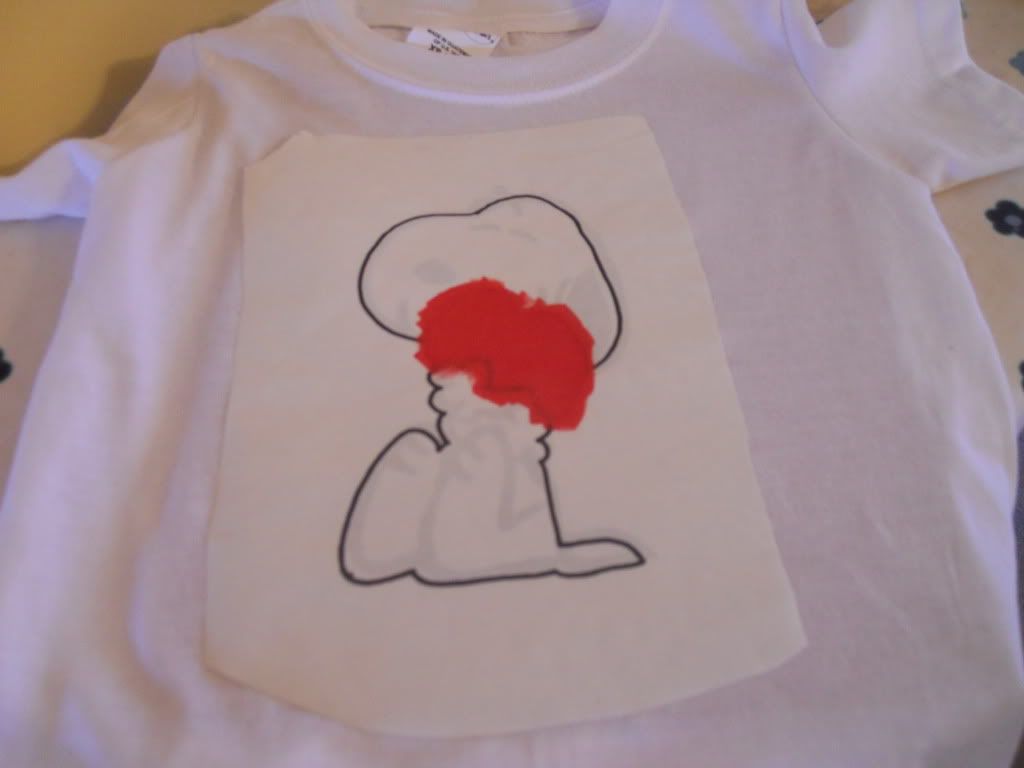
Here's my extra step…since I wanted the heart Snoopy's holding to be red, I did another freezer paper stencil of the image, just cutting out the heart. I just outlined the rest of Snoopy so that I could have a reference when lining up the image over the one already painted on the t-shirt.


Again, just iron the freezer paper to the t-shirt, shiny side down. Then I painted the heart red.


Repeat the ansty-ness and dry with a hair dryer, if you want. Then peel the paper off.


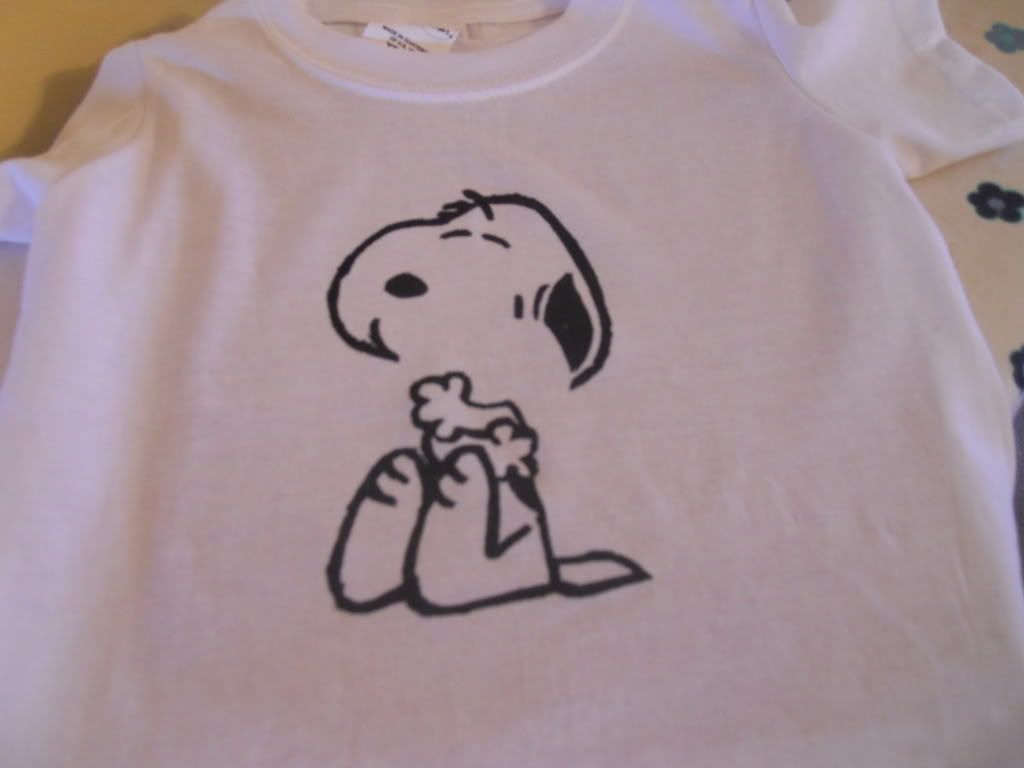
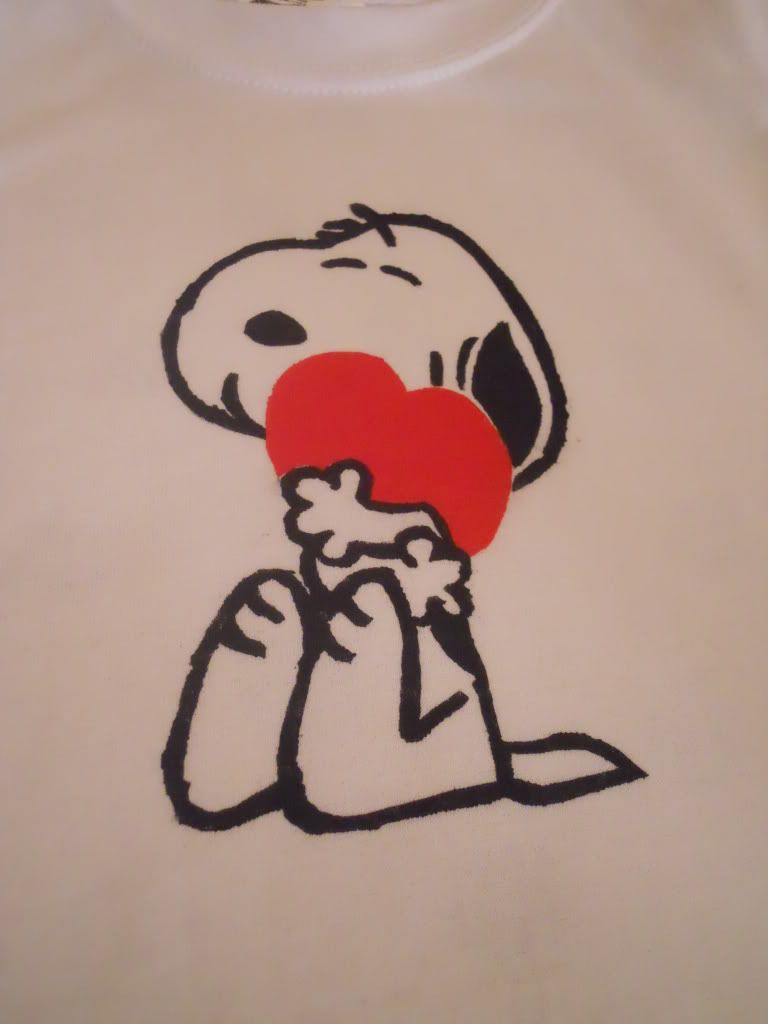
How stinking cute is that?!? I now let the t-shirt dry for a good 4 or 5 hours, and then, per Dana's suggestion (because the paint bottle didn't say anything about this), I ironed the image to seal in the paint.

Here's the final close-up…


I plan on giving this to Big W in his Valentine's treat bag on Monday so that he can wear it to his preschool Valentine exchange on Tuesday. I'll try to remember to take a picture and post it next week. I'm so excited to see him in it, and this was such a fun project I may never buy another Batman, Superman or Disney t-shirt again when I can just do this myself!

readmore»»

Wednesday, January 19, 2011

TMP Week #2: Teacup Candles

.
1 comments

Apparently, I'm on some sort of candle-kick. Sorry for the candle posts two weeks in a row!

Ok! It's time for TMP (or The Martha Project) Week #2 (I know, I know...I'm a tad late getting this entry posted. Maybe next week I need to make myself a calendar or something so I can remember.... ha!)

Anywho, I decided to try out Martha's Teacup Candles this week. Quite honestly, this was a super easy project and one that I am still amazed at how well it turned out.

Sister and I ran to the local Hob Lob last week while I was up in Lafayette helping her pack (boohoo). The 10lb slab of candle wax is hard to make out in this picture, but there it is. I also opted for two scents: Midnight and Cappuccino. (yum yum) I also purchased some candle wicks and wick holders. Tada!

The next step was to break down this massive slab of wax. I felt a little like I was in a Hitchcock movie with my giant (pink) knife, just hacking away at this wax. But alas, I did it and broke up the wax as best I could.

Ok here's where it got a wee bit tricky. Martha calls for a double boiler to melt your wax. Wellllllll....I do not have a double boiler, nor do I want to spend the money on one. So I improvised. What you see here is water boiling in a pot, with a Pyrex dish just hanging out on top. Oh and I used a slow cooker liner inside the Pyrex dish for easy clean up (thanks Dad for the suggestion...he's so smart!)
The heating went pretty well. It's a slow process. I actually crocheted and watched some NCIS while the wax was a'melting.

After the wax was completely melted (sorry I forgot to take a picture of this part), I squirted in some of the scent and mixed it up.

Then, I *delicately* poured the melted wax into my teacups, empty jars and a Valentine's Day coffee mug (PERFECT for this time of year). I used the paintbrushes to keep the wick from falling into the mass of melted-ness.

After about an hour and a half of cooling (I actually went to the gym during this part), my candles were done and ready to burn!! I LOVE the way they turned out!
The next day, I took my little blonde self over to TJ Maxx on my lunch and found these teacups. They turned out so cute and they are going in my gift closet for when I need a quick little gift! (Unless I burn one of them later!)
Gosh, I love me some Martha Stewart. She is slowly turning my apartment into a haven of awesomeness! :)
Side note--a little bit of melted wax goes a long way. I made 6 candles and probably only used about 2 pounds of the 10 pound slab. Looks like I have more candle making in my future.
Oh and I am making Week #3 tonight--and it's of the food variety. No more candles!! (for now)

readmore»»

Thursday, January 13, 2011

stashbuster goods!

.
0 comments

If you remember, one of my New Year's resolutions was to use up some of my stash of yarn before buying more of it. I was only going to do this for January, but I think I'm going to carry it on through March. I don't even feel like I've made a dent in my yarn.
Anyway, here's a picture of what I had made out of my stash through last weekend.
I'm not sure you can see this but I'll give you a breakdown of what's here:
3 sets of fingerless gloves (2 black and 1 gray)
2 owl hats
2 newsboy hats with flowers
8 earwarmers
I've also made 2 additional earwarmers that aren't pictured (because they were sent to a client) so that brings my grand total up to 10 earwarmers. Are you kidding me? I still have sooooooo much yarn left! UNREAL!
I've made more stuff since taking this picture, so I'll post this each week. Hopefully, I can get this yarn stash to go away!

readmore»»

Saturday, January 8, 2011

TMP Week #1: Glittered Candles

.
2 comments

Alright kids...it's official. The Martha Project (TMP) has officially begun!!!!!!!!!!!!
(is anyone as excited as I am? ok, just checking.)
It's week #1 and I was searching through my daily emails from good ole Martha and I came across this lovely project. Glittered.Candles. Hello??? Is this not perfect for me??

Luckily, I had these plain jane candlesticks hanging out on my little table...just looking like they needed some glitter.
So, I got out my supplies. Now Martha says that you should use spray adhesive, and I'm sure that would probably be easier to work with.

I, however, did not have any at home, so I just used her glitter glue.
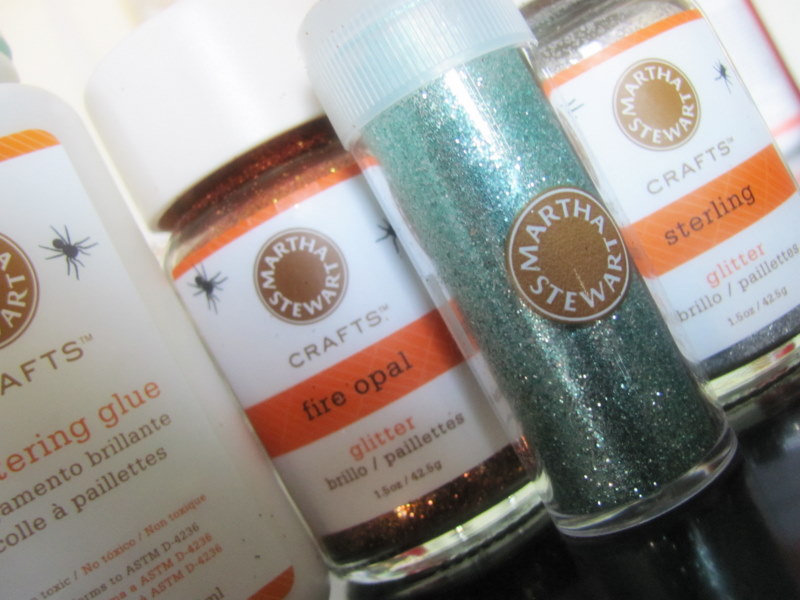
I had all of this Martha glitter in my craft stash--and I'm always looking for fun ways to use it. (P.S. I lovelovelove glitter. Just an FYI.)
And here's the final product!!! Don't they look so awesome!!
Seriously, why have plain candles when they can look so freaking fabulous with a little Martha glitter!
And then I decided I needed a candle for my bathroom (which is in a bunch of different colors), so I went with an orange glittered pillar. Love it!
Oh my gosh, I LOVE this Martha Project idea!! Week #1 was so fun! And my house is going to look so fantastic!!!!


readmore»»